Friday, July 18, 2014

Folder Organization

One of my summer tasks this year was getting my folders organized.  A big part of being an effective Standards-Based Classroom is having your standards organized in such a way that you can make sure you are not only covering the standards but also displaying them in the classroom for easy reference.

coverresized


I'm really excited about the way they turned out.  I think they are going to be so helpful this year.
The blue folder on the left is my units folder.  It contains the entire year!  It has the units, broken down into lesson plans, as well as all of the standards I need to post for each unit and all of the word wall words to be posted for each unit.

I found these great zipper pouches on Amazon. 
 (This is not an advertisement, I just really love them!)

notebook2


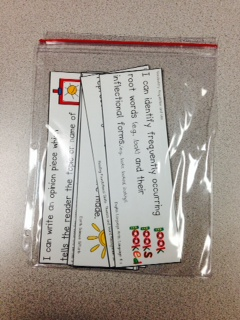
They fit nicely in a 3 ring binder and are the perfect size for the standards.  
(I have Deanna Jump's adorable set of kid-friendly standards; purchased on TPT:)

So for each unit, I placed all the focus standards into one of these zipper pouches .  If the same standard is used in more than one unit, I made more copies so that I can just grab this pouch when I start a new unit, place them in my standards display area and boom!  I'm done.
Then at the end of the unit I gather them up, put them back and grab the next set. 
It's going to be soooo easy and organized!  I can't wait!


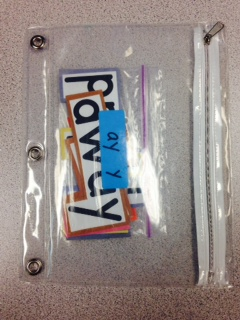
The next layer of organization is my word wall words.  I have also sorted them by unit and placed them into these little clear pencil pouches
 (purchased at Wal-Mart).
notebook4


So, for each unit, I have the standards and the words in the binder with the actual unit.  Everything I need all in one place.  Here's what it looks like all together.
notebook11


notebook12


notebook14


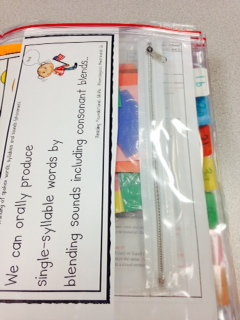
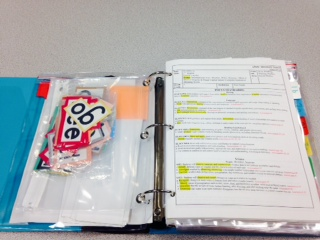
Here is my notebook open to the first unit of the year.  On the left are the pockets with the standards and word wall words, on the right is the first page of the unit itself.  The highlighted words are the verbs of the standards.  Each one is aligned to learning activities and assessments.
(Another post on creating great units will be coming soon:)


notebook15


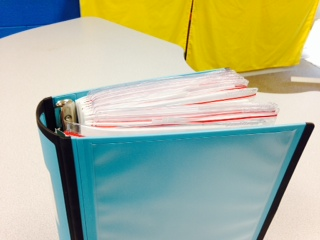
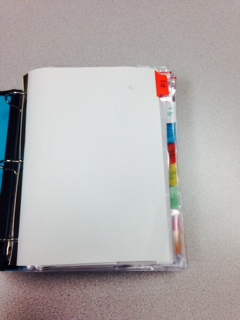
The completed notebook.  It's full but manageable.  I used a 3" binder from Staples.  It has rubber (the black parts) "hinges" that allow the binder to be very full and heavy but still open easily without cracking at the seams.  It also lays nice and flat and it easy to open and close.  These binders are a little pricey but I've had them for almost 2 years already and they are well worth it.

covers2


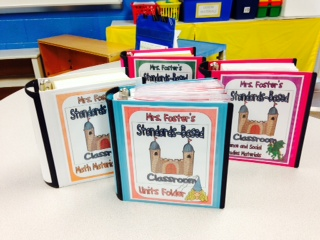
The other 3 binders contain my teaching materials.

The white one is my math materials.  Our grade level has not purchased a math program for the past two years.  I have been creating materials to meet the first grade Common Core standards and we have been using them primarily to teach our math.  All of the lesson plans and anchor charts and handouts and student practice pages are in the binder.

The pink binder on the right is my science and social studies binder.  Again, it contains units I have created to teach our standards in those areas.  My grade level friends and I decided we wanted to integrate our writing with our science and social studies so each unit is also aligned to the Common Core writing standards.

The last pink binder is my ELA supplemental materials.  Our school has a purchased phonics/reading program that we like pretty well.  That binder contains supplemental materials that I have created to "fill in the gaps" of the purchased program.

I like having all of my materials together like this.  It is going to be a real time-saver this year. 

My next project is to find a way to organize my centers materials.

How have you organized your standards and units?  I'd love to hear your ideas too!
signature
tpt store icon for website tn
If you're interested in seeing any of the materials I have created, they are available at my TPT store by clicking the link above.  Thank you!


Wednesday, July 9, 2014

The Creative Team at Standards-Based Classroom

Meet the creative team at Standards-Based Classroom.
This is Scooter.


She is very "hands" on.


                                                                               VERY hands on!


                                                          She really throws herself into it.


                                                        Sometimes we work so hard, she falls asleep at her desk!


                                              Meanwhile, the support staff warms up my computer bag; just in case I need it.


I'm so thankful for my great team.  Without them, I would be able to accomplish so much more, so much quicker.  But, it wouldn't be nearly as much fun:)


Tuesday, November 26, 2013

Handprint Turkeys

This isn't just a turkey
as you can plainly see.
I made it from my hands and feet,
which are a part of me.

It comes with lots of love,
especially to say,
I'm wishing you a very
Happy Thanksgiving Day!

Our turkeys turned out cute this year.  Notable ones shown here:) Heehee.

Hope you enjoy them!


The Quintessential Turkey
Perfectly Cute!


Up to no good Turkey
Look at those shifty eyes!


Surprised Turkey!


Molting Turkey.
Only 2 feather left, poor thing!


Quiet Turkey.
Has no mouth.


Happy Dancing Turkey
Wishing you a Happy Thanksgiving!


Too much holiday cheer, Turkey.


Wednesday, January 9, 2013

My word wall is driving me crazy

Ok.  I've had it with my word wall.  I loved it when I set it up almost 5 years ago but it has really taken a beating this year.

Look at the "V" and the word that has fallen on the floor!
 I really liked the black against the blue for bright clear contrast but it is getting a little raggedy.  The red carpet is where I have story time and since our county is making budget cuts and my class size almost doubled this year, we are squeezing in so many kids for story time that some kids are leaning against the word wall.

Here's a close up of my poor word wall.  Pathetic!
I got inspired over Christmas break and made a really cute set of labels for the word wall that was sort of "Elmer" inspired (love that book!)  and matches the fabic I have for curtains and rocking chair cushions. 


But when I printed a test page, they were way too small.  So I'm going to have to redo them before I can update this sorry mess.

Tune in next time for my new and improved word wall:)

Monday, December 31, 2012

Santa Claus is coming to town!

Santa came to visit at Liberty. (Pictured here in the pre-k room, where we went for our turn to see him)
I took a picture of each child on Santa's lap.
I printed the pictures 4X6 on the color printer at school.
I bought 6 sheets of sparkly gold foam at Wal-mart for 99cents each.
I cut the foam into quarters and then cut out an oval picture window in each section.
I crazyglued the picture to the back of the foam and then attached a magnet.
It cost me $9 for all the supplies since I was able to print the pictures at school and I already had some magnets left over from another project. I thought it was a supernice parent gift and it only took me a few hours to complete.

Gingerbread House Party


For our Christmas party we made Gingerbread houses out of milk cartons, graham crackers, frosting and candy, candy, candy.
I started doing this as my "party" about 15 years ago instead of the old paperplate full of chips, cookies and cupcakes and I have never looked back. The kids always say it is the "funnest party ever!" and I agree!
I prepare the cartons the day before by washing and drying them and then hotgluing them to a plate for stabilty.
Then at the party, every child gets a big blob of frosting with a popsicle stick for spreading, graham crackers, and a baggie full of candies for decorating.  Some kids just sit and eat the candies out of their bags (but if that's their idea of a fun party, what can I say?)
  
Most kids however, get really creative.
Here are some pictures of our houses.
Slide the house, plate and all, into a 2.5 gallon ziplock bag and send it home! Merry Christmas!

Sunday, December 30, 2012

Christmas Ornaments

Our snowflake ornaments turned out so cute!  I hot glued wagonwheel pasta to popsicle sticks.  I used to let the kids do the gluing but they did not hold up well and they took forever........so now I hot glue them ahead of time and then let the kids paint them white and sprinkle them with sparkly white glitter.  The pictue doesn't do the glitteryness justice.  They are very sparkly!